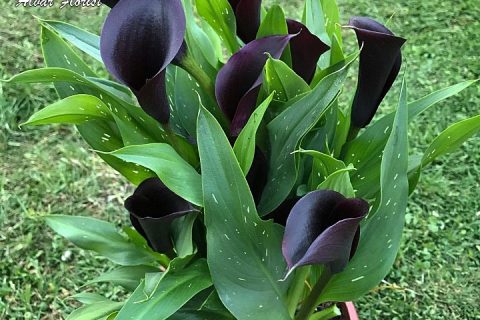
How to Care Calla Lily Over Winter with Easy Steps
Calla Lily has long been loved for its elegance and simple beauty. This beautiful flower is an asset to any garden. But, if you want to see Calla Lily year after year in your garden, then you have to take some extra steps to care Calla Lily over winter. Need to know that winter care for Calla Lily is not difficult. Keep reading this page to find out information on how to care Calla Lily over winter.
Calla Lilies Winter Care in Warm Climates
Apparently, Calla Lilies are not cold hardy. It means that Calla Lily winter care in several gardens is going to be different from other gardens. For those who live in USDA plant hardiness zone 8 or higher, your Calla Lilies are able to survive the winter outdoors in the ground, also you do not need to be dug up. Winter care for Calla Lilies in the ground in warm climates is only to mulch the spot where your Calla Lilies grow in the winter and stop watering the spot for the winter. This is going to allow your Calla Lilies to go dormant and rejuvenate itself. If you discover that you are in a much warmer climate and your Calla Lilies are not performing well, then you are able to follow the directions below for storing Calla Lily rhizomes for winter. It may be that your Calla Lilies are not getting enough dormancy and storing them will provide that for them.

Winter Care for Calla Lilies in Colder Climates
For those who live in zones 7 or lower, Calla Lilies will not survive the winter cold so that your winter care for Calla Lilies are going to be different than for warm climates. Your Calla Lilies in winter are going to consist of digging the rhizome of the plants. Keep in mind that in some areas, like zone 7, Calla Lilies may be left in the ground with added protection over winter and still come back. Thus, you may want to play it safe and dig them up. Remember that the best time when to dig Calla Lilies is right after the frost has killed the foliage. This is going to ensure that your Calla Lilies have stored all the nutrients they are able to survive over winter.
The next step to care Calla Lilies over winter is after you dig them up, you have to brush off any remaining dirt gently. Please do not wash the Calla Lilies rhizomes off because this will be able to cause the rhizomes to rot later on. After that, you have to cut off the foliage from the top of the rhizomes, leaving approximately 2 to 3 inches or 5-7.5 cm of the dead leaves. After this, you have to leave the rhizomes to dry in a warm and dry place to dry for 4 to 7 days. This is very crucial for Calla Lilies care in winter as it allows the outer skin of the rhizome to toughen up, and will assist it survive the winter. This is known as curing.
After the Calla Lilies rhizomes have already dried, you are able to place them in a paper bag. Or you are also able to wrap them in newspaper. Please store them in a cool and dry place, somewhere that stays around 10 C (50 F). Of course, proper Calla Lilies winter care is very crucial to having those lovely flowers in your garden year after year.
Great Way to Store Calla Lilies Over Winter
- Firstly, you have to cut back your Calla Lilies’ inflorescences to 3 inches above the soil line by using garden shears after the first light frost yellows or damages the foliage. Loosen the soil 3 to 6 inches from the base of the callas by using a garden trowel.
- Please work the trowel around 6 inches under the Calla Lilies. Loosen the soil ball containing the rhizome and its roots by rocking it up and down. Then, lift the soil ball and the lilies from the ground.
- You need to pick away the big clumps of soil from the rhizomes and roots with a wood skewer or pencil. Please place the rhizomes under cool-running water to rinse away the soil.
- Now, you are able to space the Calla Lilies around 2-inches apart in a single layer on a table placed out of direct sunlight and shielded from the rain and wind. Let the Calla Lilies cure outside for 3 days to a week if the temperature remains between 60 and 70 degrees F.
- The next step is to scrape away any remaining soil from the rhizomes and roots by using a wood skewer or pencil. Please tag the inflorescences with a garden tag with the cultivar name written on it. Also, you are able to write the cultivar name on the rhizome with a permanent marker.
- You need to line the bottom of a vented plastic container with 1 to 2 inches of substrate like peat moss or vermiculite. Just space the Callas Lilies approximately 1-inch apart on the substrate. If you do not have a vented plastic container, you are able to use a cardboard box with some holes punched in the sides.
- Now, you have to cover the Calla Lilies with 1 or 2 inches of substrate. Ensure that you fill the spaces between them. Please place the container in a frost-free room with low humidity and a temperature between 40 and 50 degrees F until the danger of frost ends in spring.
- Look at the Calla Lilies every week or two over winter and check for drying and wrinkling. You need to spray the substrate several times with water from a spray bottle if your rhizomes look a bit dry. If needed, you are able to soak a utility knife in a solution of 9 parts water and 1 part all-purpose bleach for 15 minutes to sterilize it and then cut away any rotted or moldy portions of the rhizomes. Please replace any substrate which appears or smells rotten or moldy.


One comment